mandag den 7. december 2015

Christmas presents - my list


I know - a homemade present isn't everybody's cup of tea, but occassionally I do like to make a little something for my unsuspecting friends and family. I like the idea of making something personal especially for this person. But what to make? I don't like to force anything on anybody, that I'm not totally sure of - especially if it's clothes. Clothes is such a sensible topic since it must not be to big (do you think I'm this fat?) or too small (will not be used) and has to be the right style.. I'm afraid these thoughts mostly is something I'm thinking about when making gifts for the ladies in my life. Usually (young) kids or men are not that fussy - or have more of an ecclectic style (ahem))

I've tried to make a little list of my surgestions for gifts. Some I've previously made - but I'm not showing this years production until after the big reveal on christmas eve (here in Denmark we open the gifts on the 24th in the evening).

The kimono

My favorite this year is the bathrobe - or for the more fashionable; the kimono. A bathrobe or a kimono is a sure winner since there is no need for fitting (that much) and it's pretty easy to sew. I've made a few in the past you can see here:

One for my sister:

One for me:


You can find the pattern I've used here


And I've even made a kimono size 6 and size teddy:

If you want to make a more out-of-the-house sort of kimono there are loads of free patterns online. I'm planning to sew up one of these in a lush silk velvet for christmas for ME and I plan to use this pattern:


Find it herhere

Lace

Another great gift for the ladies is anything with lace... If you choose a stretch lace it can be quite forgiving fit wise and still look impressive. I've previously sewn lace panties for myself, but that might be a bit strange to sew lace underwear (unless it's for your girlfriend) - but a lace camisole or a lace t-shirt wouldn't be uncomfortable to unwrap in front of the in laws. I've made this one a few month ago just using an old camisole as a pattern:

T-shirts

If you find some great fabric a t-shirt could make a good present. There are many good patterns online but my favorites are the free t-shirt patterns the Hemlock T-shirt and the Kirsten Kimono T-shirt.They are both easy to make and not formfitting.

Kirsten Kimono tee


Hemlock


Find it here

Make up pung

Makeup pouches and other pouches are also good gifts - perhaps including a nice handcream or perfume.. A lot of free tutorials can be found online. I haven't used this specific one- but it looks fine to me. It's made by the lovely Anna from Plan B:


You can download the free pattern here


Have you made any handmade presents yet - or do you plan to? Please spill the beans if you have any good surgestions!


Happy sewing

Mette

mandag den 23. november 2015

The finished coat

I'm so happy to show you this coat. I have been working on it for about a month - on and off - and now it's finally finished! - Just in time for the cold and the snow that hit Denmark this weekend.


I wrote a blogpost about the construction process here, so this post will be all about the pictures and me rambling about what I've learned.


I chose a simple, classic sillouette for my first babysteps into coatmaking. I'm hoping a classic coat will last me more than one season - and that all the tailoring will make it look good for more than one season too..


So what did I learn from this project?

- I learned a lot of the basics of tailoring. I now know the dirty secrets of a good coat and the amount of time it takes to make it.
- I learned that using horsehair canvas the right places will add stability and a more professional look to your garment. The horsehair canvas also helps to shape the fabric properly.
- I learned to use beeswax to reinforce the thread when sewing by hand.
- I learned to use sleeveheads. I can't understand why I haven't done that before. Sleeveheads are from now on, a must do for my slopy shoulders when sewing a jacket or coat.
- I learned how to interline a coat for warmth


In the next two photos you can see what a sleevehead and shoulderpads can do for a coat.


I really like that the front piece is sewn to the backpiece like this:


Here you can see how I lined my coat. It's a navy-black twill weave acetate lining I've used. The lining is hiding all the tailoring made on this coat and the interlining.


I used two large snaps to close the coat properly. I guess, I could have gone with just the belt, but since this is a wintercoat, I feel it's nice with a possibility for a proper closing.

What would I do different next time I make a coat?
- I would use horsehair canvas down the front instead of fusible interfacing. I think I would still use fusible interfacing on the facings and the hemlines of the sleeves and coatbody. In this coat I only used horsehair canvas on the lapels, and for shoulder reinforcement and in the collar.

Have you got any good advice for coatmaking?

Have you planned any coats this season - or have you already made one? Please spill the beans!


Happy sewing


Mette

fredag den 20. november 2015

Coatmaking

I made a coat! I never thought I would in a million years - always been scared of all the tailoring involved. This year I was really in need of a new wool coat and my inner cheapgoat won me over. The coats I like in the shops are usually quite expensive and they don't fit me that well since I'm two sizes bigger around my derriere compared to my bust - I call it extreme pearshape..
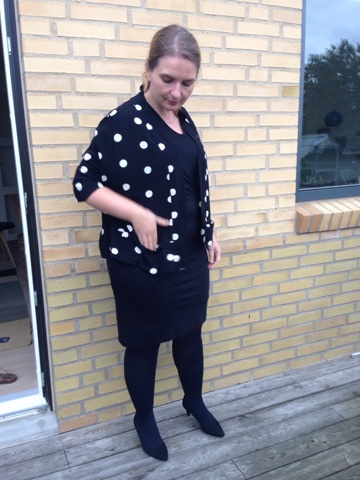
Last year I made this coat - or put correctly a coatigan. It didn't involve any tailoring apart from fusible vlieseline and was frankly a really easy make. Last winter I had this thought of one day being able to make a proper wintercoat, but I never imagined I would take the leap this fall.

I'll break up my coatmaking in two blogposts. This first one will be about all the work put into making a coat and the next will be the big reveal. Sit tight if you are curious about coatmaking. It wasn't as hard as I imagined, but I wouldn't recommend it to the faint of hearted or for the very impatient seamstress.

First, a sneakpeak of my finished coat before rambling about all the steps for making a tailored coat.


First, choosing a pattern. I had a picture in my head of the coat I wanted to make. Unfortunately my dreamcoat didn't come with a readymade pattern, so I used pattern no. 102 from the november issue of Burdastyle 2013. This pattern isn't really suited for a wool wintercoat. First of all, its made of linen cut on the bias.. Who wears an unlined linen coat in november? Not in my hemisphere. I decided to change the grainline of the pattern and make a muslin to test the fit, when cut with a more ordinary grainline. I cut the coat one size larger than my usual size, since the wool, interlining and lining are much more bulky than one layer of linen. My muslin showed, that the sleeves were very narrow so I made the sleeves wider - I want to be able to wear a sweater underneath the coat. I used this Threads article on how to make the sleeves wider. On another note - please consider using a two piece sleeve, when making a coat. Your arms doesn't hang straight down your body and so shouldn't your sleeve either. A coat sleeve is usually quite thick and this will result in pull lines across your sleeves if you don't use a two piece. This is especially the case if you use a narrow sleeve and less so with a wider sleeve.

Burdastyle is notoriously known for providing very sparsely sewing guidance. I therefore also bought the book "Tailoring - sewing the perfect jacket" from Amazon. I would never have been able to make this coat without this book. Please ignore the pictures from the eighties - the author knows all about tailoring a jacket. I referred to this book again and again. The book also tells you about the difference between different tailoring methods and where to use them. I highly recommend this book if you are interested in making a tailored coat or jacket.


Second step in my coatmaking was gathering the supplies. I bought this nice kashmir blend wool from Metermeter. It's so soft, but presses beautifully. I bought this lining from Stofdepotet in a darker colour. It's unfortunately now sold out. It is a nice twillweave in a navy-black colour. Since I live in Denmark, I wanted my coat to be really warm so I can use it all winter. I therefore bought a thermal interlining. The interlining is really thin - almost as thin as the lining and doesn't add much bulk - only thing about the interlining is, that you shouldn't put your iron anywhere near it or it will melt. So be careful about the steps in your coatmaking and don't put your interlining in before you have finished pressing your coat.

New to me in this coatmaking process was horsehair canvas. It's a sew in interfacing that adds a crispness to your coat a regular fusible will never do. New to me was also using bees wax to enforce the thread when handsewing. This worked so well and I will surely use this again.


Third, after cutting out all your pieces the tailoring part begins. Some patterns (esp. vintage) will have pattern pieces for the sew in interfacing as well. Since this is a Burdastyle pattern it doesn't. I had to make pattern pieces myself. I'm no expert, but I can tell you how I did it. I cut out sew in interfacing (the horsehair canvas) for the revers seperately and then for the front - see picture below. I also cut out a backstay and back undercollar in horsehair canvas. I used fusible interfacing to stabilize the front and facings. I also used fusible interfacing to stabilize the hemlines on the coatbody and sleeves. I used the advice given in my tailoring book and i'm quite curious how the coat will hold the shape after some wears. I hope the different types of interfacing will make the coat last for more than one season.


This picture shows how I sewed in the horsehair canvas on the back undercollar. I drawed the rounded lines by hand and then used patchsticthing to shape the undercollar to hold is shape.


Here you can see how I interfaced the front pieces. First a generel fusible interfacing (but not on the revers) and then a sew in interfacing on the revers and on the shoulders. Be sure that the sew in interfacing on the revers ends excactly on the foldline, where you want the revers to fold back.

Here you can see how I interfaced the revers. After the sew in interfacing I added a sturdy ribbon - any will do - the green is actually for giftwrapping... - add the ribbon to the edges on the revers but not in the seamallowance. Also add a ribbon on the excact foldline. Mine is black here. Also, note that its really important that you sew the interfacing on the revers in correctly. Its the seamlines that will make the revers fall nicely to the correct side. Here you see my lines. I sewed along the drawn lines on my sew in interfacing.
The coat sure isn't pretty on the inside, but all this is to help build and stabilize the shape of the coat.


I forgot to take pictures of my sleeveheads. The sleeveheads are used to stabilize a nice rounded shoulder and prevent it from collapsing during wear. My tailoring book told me to use lambswool for sleeveheads, but I didn't have any. I turned to instagram for help and the lovely Nanna from How to make fashions told me just to use the wool from my coat. I cut two pieces of the wool on the bias - approximately 3-4 cm wide - and sewed it into the sleeves between the front and back notches (not under the arm) stretching the wool slightly as I sewed. 2-3 cm of the biasstrips were in the sleeves and 1 cm in the coatbody. That way the bias strips will prevent the sleevehead from collapsing. Hope this explanation makes sense?

On the last photos you can see my backstay. I didn't patchstitch my backstay to the back coatpieces. I just sewed the backstay to the seamallowances.


Not shown here is the thermal interlining. I used the lining pattern to cut the thermal interlining but I didn't add seamallowance on the shoulder and for the coat hem and sleeve hem. I sewed the thermal twopiece sleeves together and cut down the seamallowance to a minimum. I then sewed the thermal sleeves to the coatsleeves in the stitching line. I sewed the sideseams on the front and backpieces of the thermal interlining and sewed the thermal interlining to the shoulder seamallowance of the coat body. Remember to cut away as much of the seamallowance of the seam interlining to avoid too much bulk.

The last step of making a coat is to sew in the lining. I didn't do a bagged linning, so I sewed the lining to the facings and then handsewed the hem of the lining to the coat in the sleeves and to the coat hemline.


Are you still here? I´m sure this was quite a long and rather boring read if you are not planning a coat. I hope you can use my ramblings if you are making a coat yourself. Don´t hesitate to ask, if there is anything you would like to hear more about.

Coatmaking isn't that difficult - it just require a lot of patience if you are using the sew in interfacing method. Otherwise it's not more difficult than making a shirt.

How about you - are you making a coat? - and which one are you making?

Stay tuned for the big reveal:)


Happy sewing

Mette

fredag den 23. oktober 2015

Olivia wrap dress

Hyvää päivää!

I had to start my blogpost about the Olivia wrapdress with a "hello" in finish. The Olivia wrapdress is from the cool finish pattern company Named Clothing. Named Clothing is owned by two sisters who release pattern collections a few times a year. I really like a lot of their patterns because of the modern and contempory vibe.

All right, enough fangirl raving and back to the dress!


This dress is as comfy as a pyjamas. Its made from a soft viscose knit from Stof og Stil. The dress is a fabric eater and requires 2,90m, but don't be tempted to buy cheaper stuff, because this dress is so comfy to wear, that you'll wear it again and again.


I have seen so many wrap dresses in the sewing community the last six month, but not in the shops? Sometimes the sewingworld creates it's own trends? I remember I had a wrap dress - maybe 10 years ago?. I also remember the skirt to be quite clingy and to show all the lumps and bumps I had back then. I still have the lumps and bumps - and these days I have even more than back then, but this dress is constructed with small pleats which make the sillouette on (curvy) women look more attrative. And the idea of sewing your own clothes is to get clothes that fit your body and not just the clothing companys idea of a body. Anyway, all this ranting was just to say, that I really like my wrap dress and I'm sure it will be an everyday dress I'll use a lot this winter.


The only alteration I did on this dress was to cut off 13 cm. The pattern will give you a calf length dress, but I'm not sure this is a very good dress lenght on me.

Pondering about making more wrap dresses....


Do you plan your sewing after what you see in the shops - or where do you get your inspiration?

Happy sewing


Mette

torsdag den 22. oktober 2015

Tokyo jacket - new kimono

I really love a good kimono. I have made two so far - but they are housecoats. You can check them out on instagram if you are interested. So I think I could justify making one for everyday use also...:)


I chose the Tokyo Kimono jacket pattern by Tessutti Fabrics because of the interesting pocketdesign. I think this small detail makes it a bit more special - eventhough I'm probably the only one noticing..


The fabric is a really nice drapy woven viscose I purchased from Fabricgodmother. (Don't look it up unless you are prepared to be tempted by all kinds of beautiful fabric). The viscose is a remnant from Coccinelle and I must say it's one of the best viscose fabrics I've had my paws on. I'm considering buying more for a dress - maybe a Maryanne dress?


Here you can see the design details:


How you tried any kimono patterns you can recommend?

Happy sewing

Mette

onsdag den 21. oktober 2015

No3 Kastrup silk top

I was given this wonderful pattern by Nanna, a taylor and patternmaker with the blog and shop called How to do fashion.
Nanna is so skilled and pays lots of attention to details. I love it.

The pattern arrived in its own cardboard envelope including the pattern and a label with "How to do fashion". You find the instructions for the pattern on Nannas webpage.


The pattern comes with lots of cute details. It feaures double layer cap sleeves, princess seams, raglan sleeves and a back slit. Everything is constructed and finished so clever - the true mark of a real taylor.


I took my time sewing this pattern. I wanted it to be just right. I had a lux dark blue navy stretch silk in my stash, I had been saving for a special project and this was it. I truly love this top even though I'm not quite sure the stretch silk was a good idea. The raglan sleeves came in a bit wobly due to the stretch factor. This is not something that will prevent me from wearing this top, but when I make it next time, I'll be sure to use non-stretch lightweight drapy fabric. I still learn a lot from every sewing project - and I really love when a pattern can learn you a new construction method.


On another note - I made some pretty boring black basic seperates which you can see in this blogpost too. A black wool stretch skirt made from a Burdastyle pattern. Nothing much to say about that, but it sure is comfy due to the stretch factor. On the last photo you get a glimpse of my new woolen pants. This is my first dip into pantsmaking (sweatpants aside). They are not perfect fit-wise, but definitely better than most of my RTW pants. I used a pattern from Burdastyle september issue from 2013 #136. It has a sidezip. At some point I would like to make a pair with a regular fly opening.


Thank you so much for giving me the pattern Nanna.

Happy sewing

Mette

tirsdag den 20. oktober 2015

Blue silk shirtdress

Hello again sewing friends - and random family members:)

Nothing much is happening on this blog - because I've been sewing like a maniac the last few month. When it comes to choosing between sewing and blogging, sewing always win. This dress was finished at least a month ago and have had few outings.

The dress is from the Burdastyle Magazine from august 2015. I was immediately attracted to the kimonosleeves and loose tent like shirtdress appearance. Nothing beats a tent - it's easy to fit and wear - and I like the sillouette - at least with a belt..


Would you look at that fabric. I bought in a shop on Montmartre in Paris this summer. It's a 100% lightweight silk with a large paisley pattern.


Construction wise the dress was fun to sew. I like sewing the collar and all the nitty bits in a shirtdress. The hidden button placket took me a while to figure out - because Burda! No clear instructions. It came together in the end and I'm happy with the result.

This pattern is a plussize pattern size 44. Since I'm a 40-42 and I didn't size down it's a bit more oversized than the pattern suggests. I added an extra hidden button above the button placket to spare colleagues a boobflash at meetings - I'm nice that way:)

I didn't change the shoulders since this is a kimonoshape and since I wouldn't know how to alter the collar to a smaller size. Lengthwise I cut of my usual 10-12 cm. This is a common alteration for me, since I'm a shorty (and chubby).


Sorry about the blurry photo of my backside - my photographer needs a course, but he doesn't seem that interested in developing his skills...


Even though this lightweight silk isn't very suitable for the danish fall and winter, I think I'll use it anyway with tights, boots and a cardi.

I have a long backlog of unblogged garments so stay tuned for the next few weeks - esp. if you are into blurry photos:)

I hope your fall sewing is coming along as well. I'm still quite excited about my plans for fall sewing and have completed quite a few items from my list (- and quite a few not on my list too).

Happy sewing

Mette

mandag den 5. oktober 2015

The Sew What Club: Cocoon Dress for girls

I guess I'm on a girls dress sewing binge these days - or maybe just procratinating on the black wool pants I'm working on for myself?

Anyways, these cocoon dresses were the reasons why I signed up to The Sew What Club. The pattern is drafted by the famous and ever cool Groovybabyandmama. And who doesn't crave just a bit of Trine's effortless style? As you see, I do - I even used the same fabric as Trine, since I already had the grey terry in my stash. I'm such a pathetic fangirl!


I guess effortless photography is not a thing around our house. These were the best photos of hundreds.. Sigrid never misses an opportunity of making funny faces.

Here you get a better glimpse of the pattern. The patterns features a simple cocoon shape, elbowlength sleeves and shoulder ruffle. The dress hemline is shorter in the front.


I made a few changes to the pattern:
- lengthend the sleeves to 3/4 length
- finished the grey dress with ribbing in the neckline, since the neckline was a bit big for Sigrid.
- finished the shoulder ruffle on the grey dress with my overlocker
- made the shoulder ruffle of the blue dress in double layer, since the fabric I was using was white on the backside. This makes the ruffle a bit stiffer
- For the blue version I used a cotton jersey instead of the recommended heavier fabric.


It took me about 1,5 hour to make a dress like these. If you leave out the shoulder ruffle you could make it even quicker. I'm sure this will be my go to pattern for everyday dresses for my girls. I'm a bit hesitant to use too much time on childrens clothes since their span of life is often so short. The children grow and they wear their clothes hard.


I have one more girls dress coming up. I'm working on a shirtdress for Selma in a lovely Atelie Brunette Cotton. I bought the cotton to make a shirtdress for me, but she pursuaded me to make it for her instead... I must teach her to sew her own soon!

How about you - are you hesitant using time on childrens clothes?

Happy sewing

Mette

tirsdag den 29. september 2015

The Sew What Club: Maren Dress

This is a brief intermission from my fall sewing plans. Sigrid needed a new dress for a birthday party, I had this liberty fabric in my stash and along came the Maren Dress Pattern from The Sew What Club. It was meant to be.


The dress has a small peter pan collar, kimono sleeves and a dropwaist design with pleats. It comes in size 2-12 years old.


I don't know if you have heard of The Sew What Club? It's a subsription for pdf patterns. You get to choose between the childrens edition with two patterns a month or the women edition with one pattern a month. The patterns are designed by different indie designers - The Maren Dress is designed by Hey June Handmade.

With two girls it's great getting new inspiration on what to make for them. I didn't think the Maren Dress pattern was to Selma's (10 years) liking, but she has requested one in chambray. I guess a chambray version will be less cutesy than this floral liberty version. Better get on with that.


The dress came together easily. I didn't follow the instruction, but they appear to be clear. I changed the back keyhole to a smaller slit, since the fall season here in Denmark require a vest underneath. I subsequently changed the back facings and added a small roleau and button.


Here you can see the pleats. They are distributed towards the sideseams.


Sigrid was so happy with her new dress. I really should make more dresses while she still prefer the handmade to the storebought dresses.


I have a few items to show you from my fall sewing list as soon as I get photos. I guess the list wasn't quite complete, since new patterns suddently jumped the queue.. Sewing is a hobby so it's okay to bend the rules sometimes right?

Do share your fall sewing plans. What are you working on?

Happy sewing

Mette